WorkdayTracker is designed to help you stay on top of your workday by tracking your activity in a seamless and transparent way. In this guide, we'll walk you through how to install, set up, and use the WorkdayTracker desktop app on Windows and Mac.
What is the WorkdayTracker Desktop App?
The desktop app is the heart of WorkdayTracker, allowing you to record your work activity efficiently. It tracks:
- Mouse and keyboard activity (not keystrokes, just activity presence).
- Windows in focus to understand which applications are being used.
- Running applications to track productivity.
- Hardware details for troubleshooting and performance tracking.
- Screenshots at regular intervals for activity validation.
Note: The app only records when you allow it to and can be paused at any time for privacy.
Step 1: Download & Install the WorkdayTracker App
Getting Started:
- Go to WorkdayTracker.com.
- Log in to your account. If you don't have one yet, sign up for free.
- Navigate to the Downloads section.
- Select and download the version that matches your operating system (Windows or macOS).
- Follow the installation instructions for your system.
Note: In this guide, we assume the app has already been installed.
Step 2: Grant Permissions
When you open the app for the first time, it may request permissions required for proper functionality.
- Windows Users: Grant requested permissions when prompted.
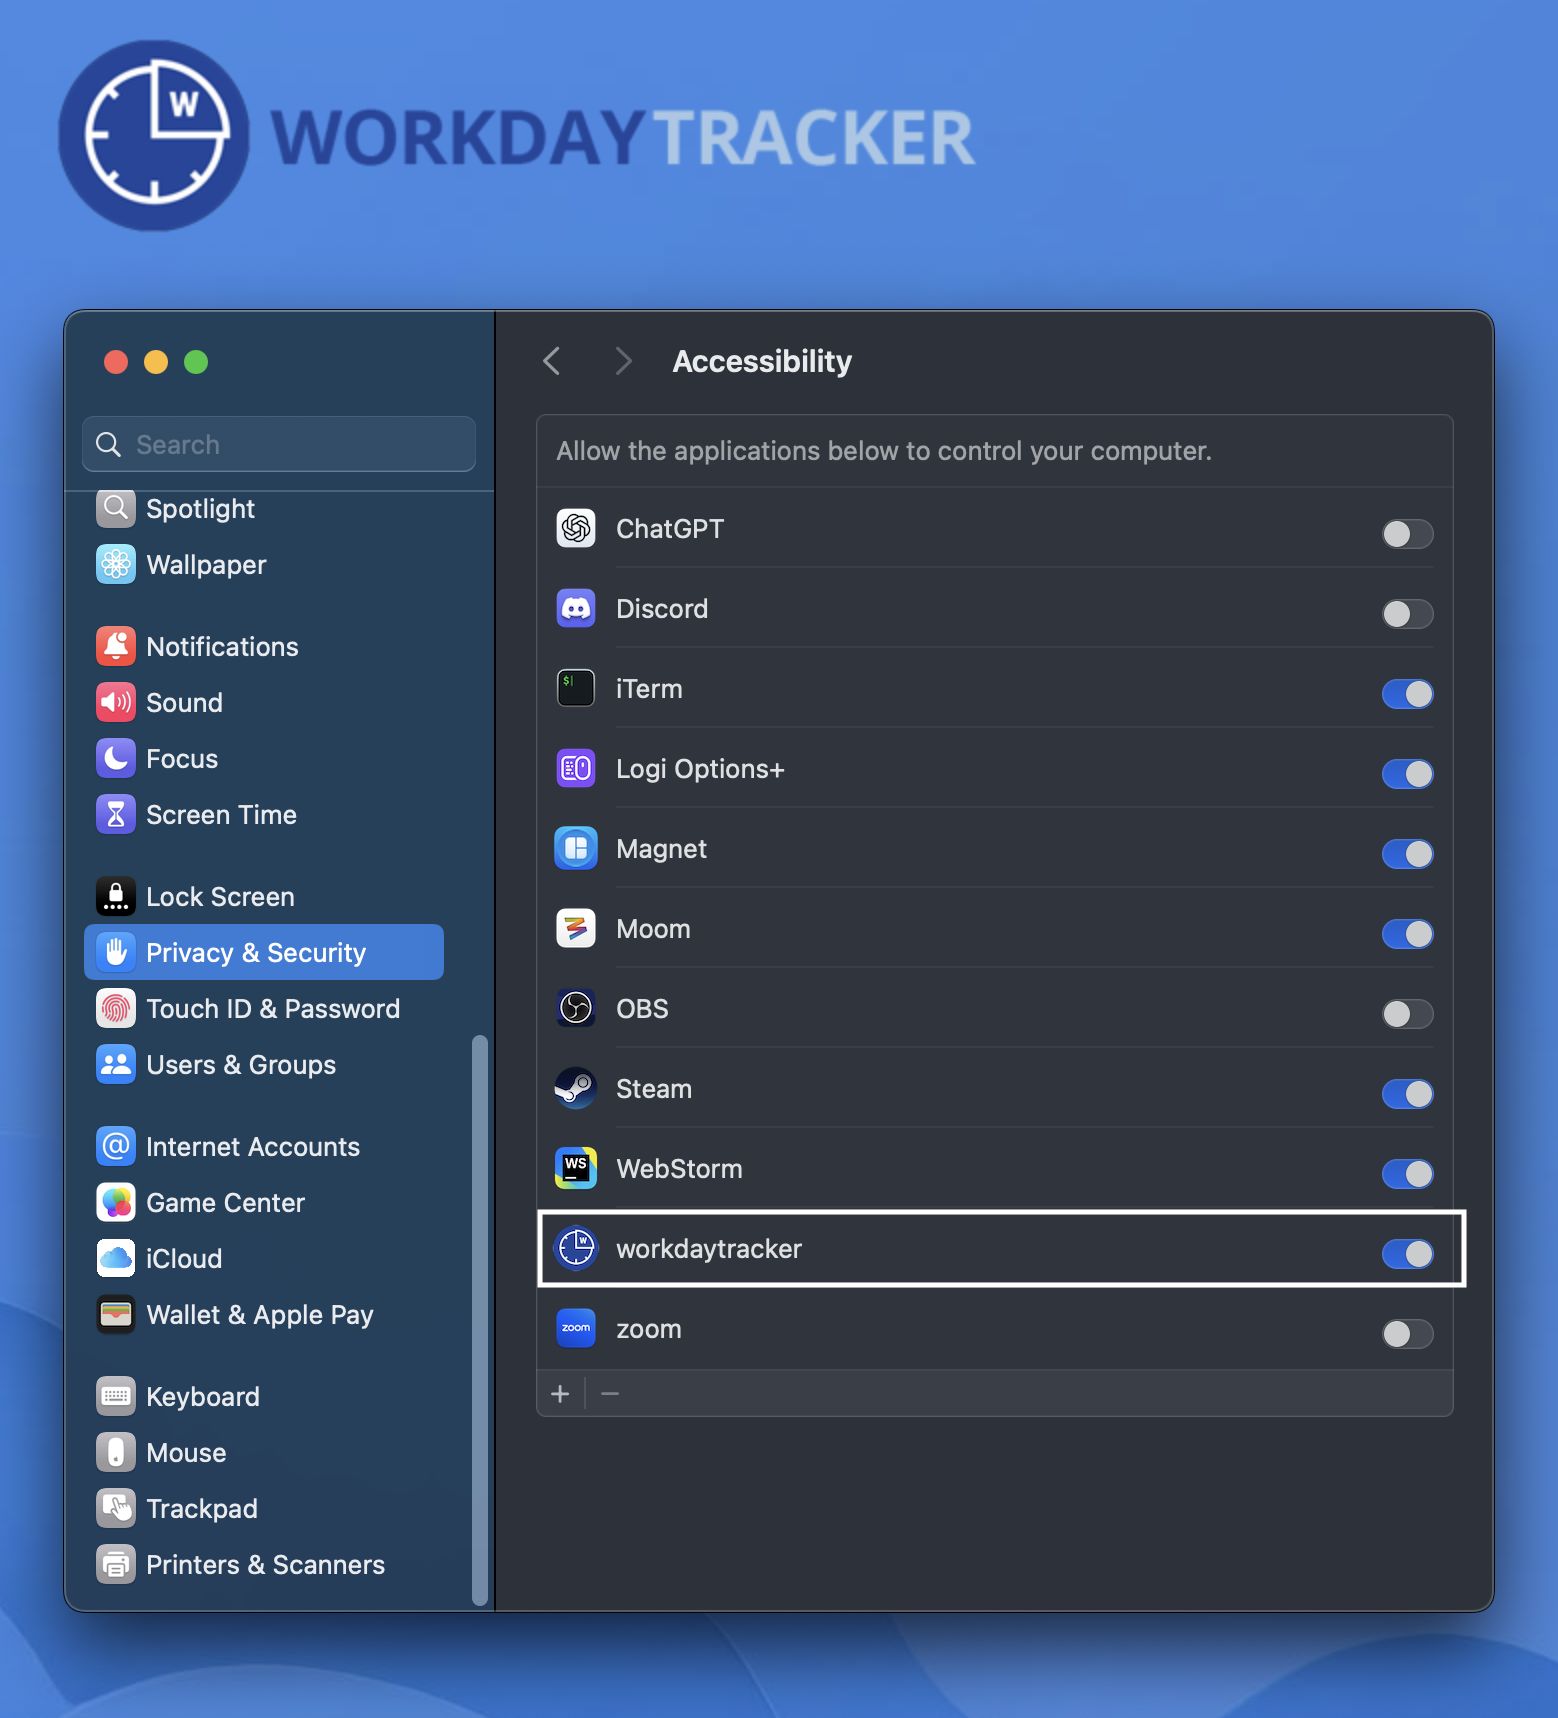
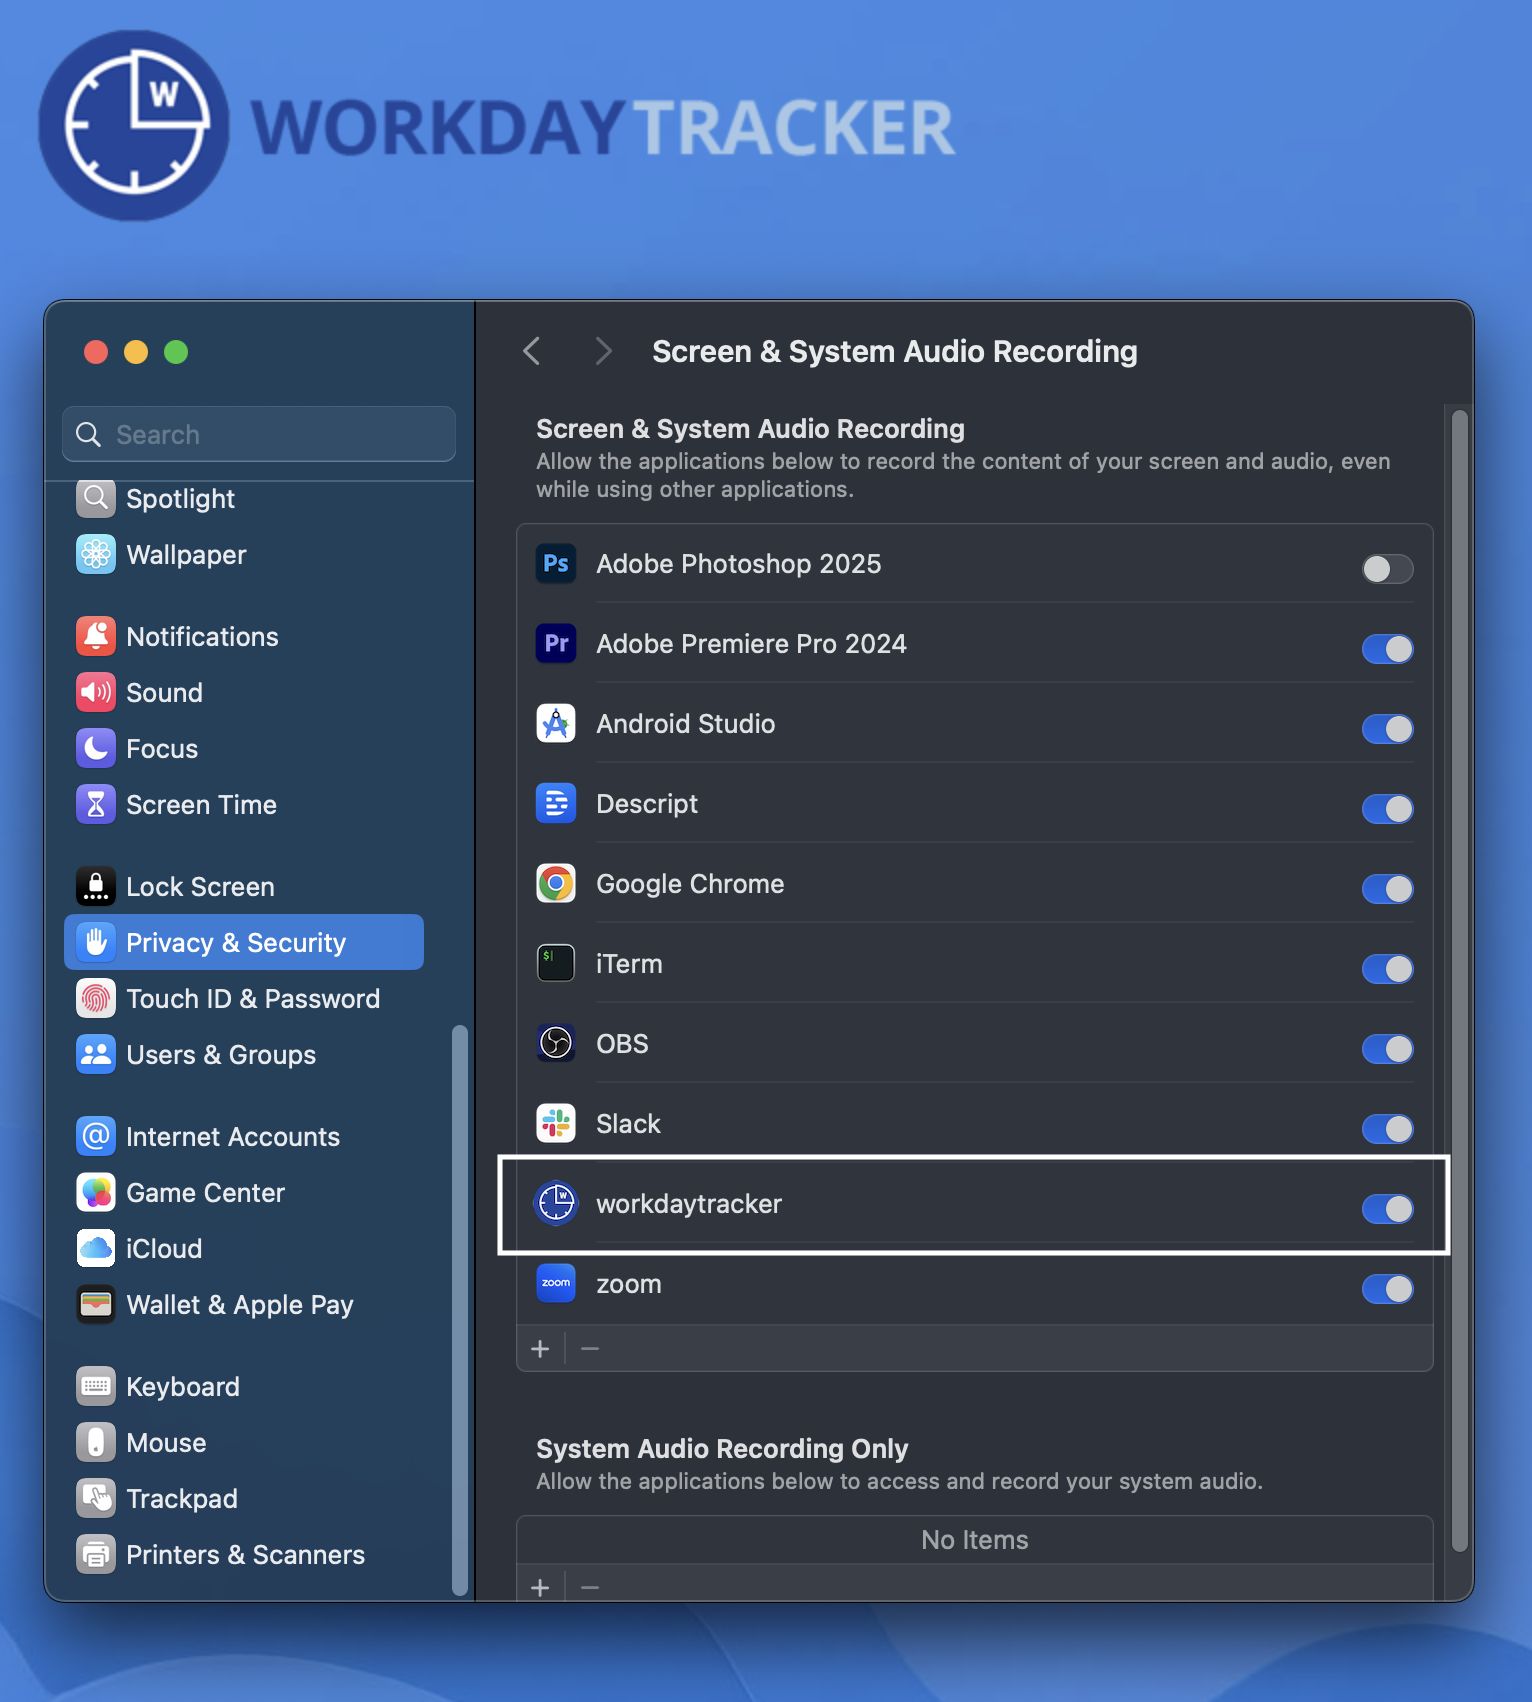
- Mac Users: You may need to allow permissions in System
Preferences > Security & Privacy.
Grant access for Both Accessibility and Screen Recording.
Tip: Restart the app after granting permissions to ensure all settings take effect.
Step 3: Authorize the App
Before you can start recording, you'll need to authorize the app with your WorkdayTracker account:
- Open the WorkdayTracker desktop app.
- Click the Authorize button to open the device authorization page in your browser.
- Confirm authorization on the WorkdayTracker website.
- Return to the app—after a few seconds, it will authenticate successfully.
Step 4: Select Your Company & Contract
Once the app is authorized, you'll need to choose where to log your work time:
- Select the Company you're working for.
- Choose the Contract assigned to you.
- Click Confirm to proceed to the main app interface.
Note: Only contracts assigned to you will be visible.
Step 5: Understanding the WorkdayTracker Interface
Top Menu Options
At the top of the app, you'll find quick-access options:
- Switch contracts anytime.
- Open the Knowledge Base for troubleshooting and guides.
- Log out or de-authorize the app when needed.
Active Tasks Manager
In the center, you'll see your assigned tasks:
- Tasks with a checked box are active, meaning any recorded time will be attributed to them.
- Uncheck tasks if you don't want to track time for them.
Recording Controls
At the bottom, you'll find your recording controls:
- Start Recording: Click the Record button to begin tracking your work.
- Stop Recording: Click Stop anytime to end tracking.
- Pause: Prevents activity from being recorded while keeping the session active.
The recording timer on the right shows how long you've been tracking. It resets each time you stop and start.
Tip: Minimizing the app does not stop the recording. However, closing the app completely will stop the recording.
Final Thoughts
That's it! You're now set up with WorkdayTracker. The desktop app makes it easy to track time, manage tasks, and stay productive.
Need further assistance? Visit our Knowledge Base or contact support@workdaytracker.com.
Happy tracking! 🚀